Digital Camera Icon in Photoshop
Posted by webiconset in the Icon Tutorials section.
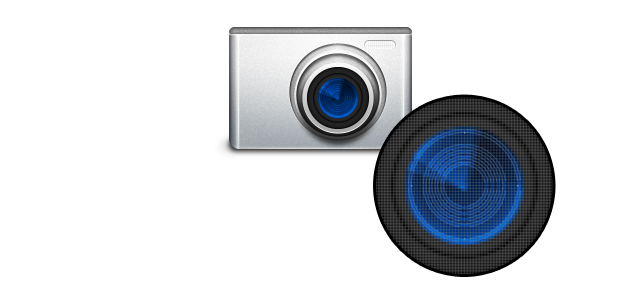
A digital camera is a camera that takes video or still photographs, or both, digitally by recording images via an electronic image sensor. Digital cameras can do things film cameras cannot: displaying images on a screen immediately after they are recorded, storing thousands of images on a single small memory device, recording video with sound, and deleting images to free storage space.
Most of the digital cameras are designed to be small and portable. We will teach you how to create a digital camera icon in Photoshop. You can follow the steps and check out the layer styles. A PSD source file is also provided for download.

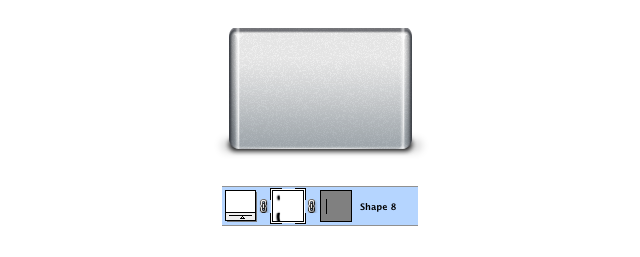
Step 1
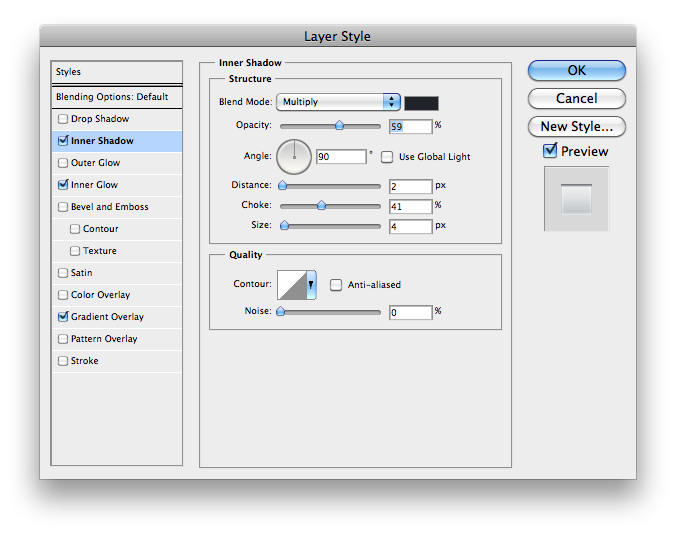
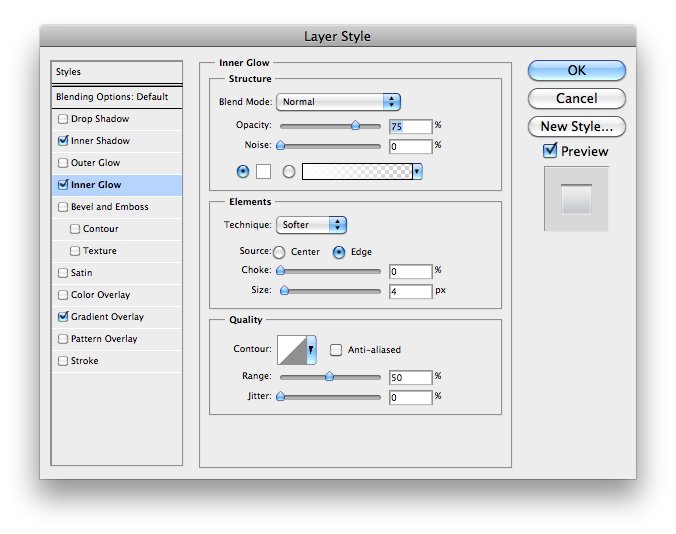
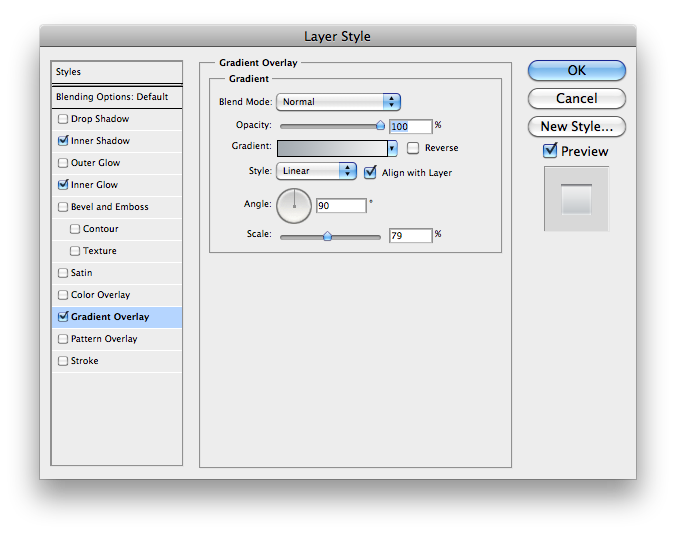
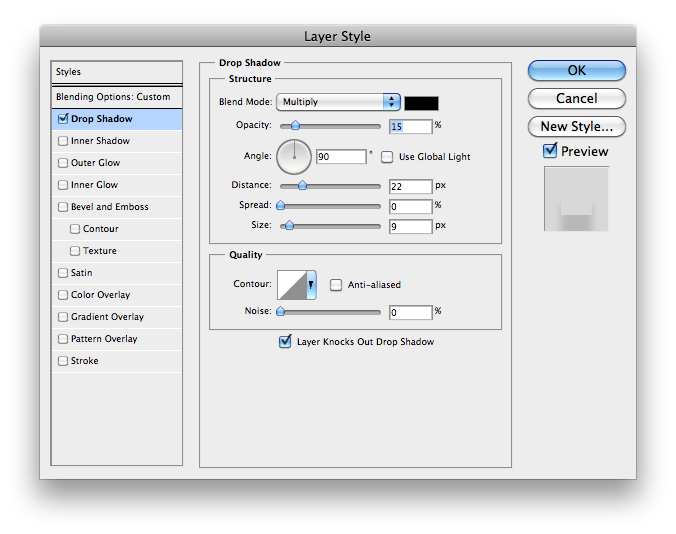
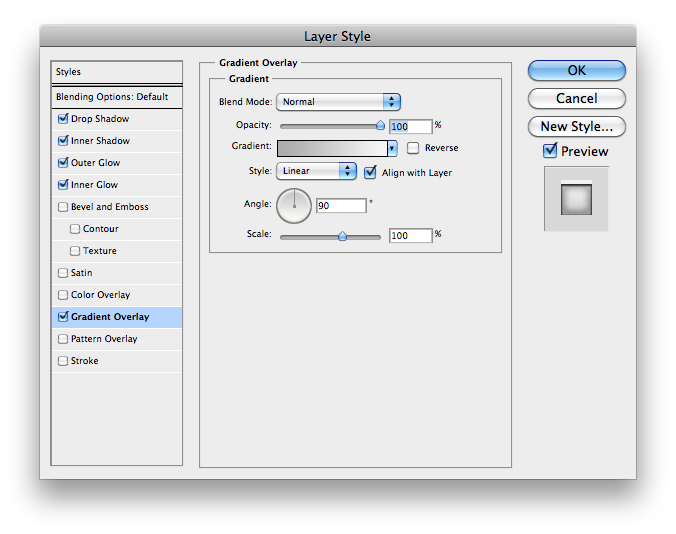
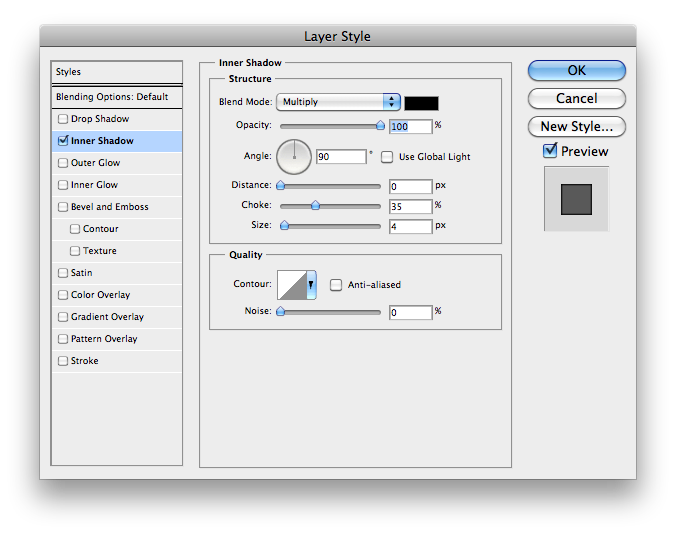
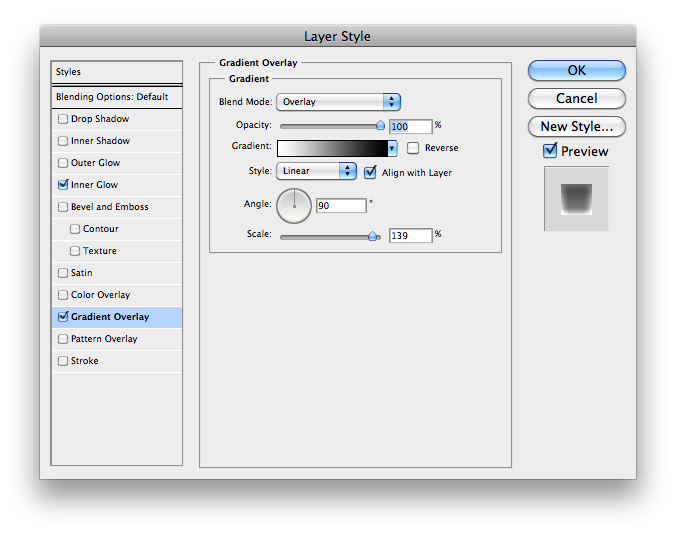
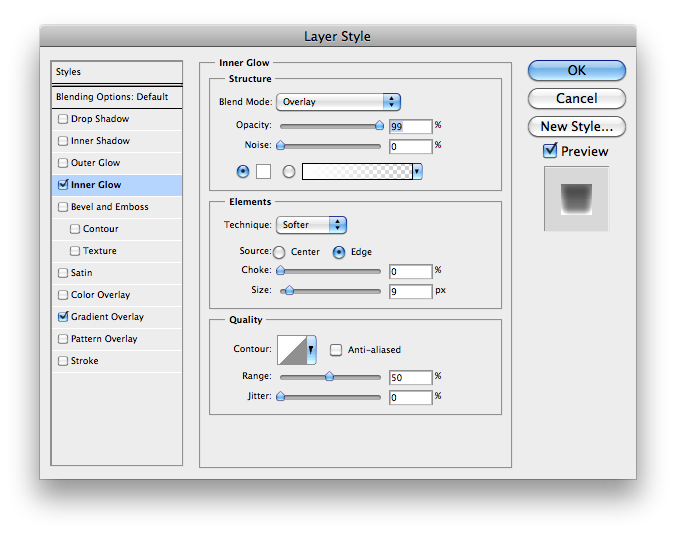
Make a rounded rectangle with a radius of 4px with the following layer styles.

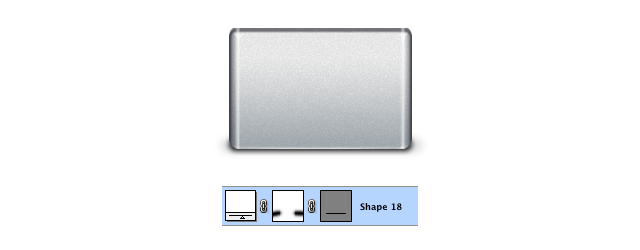
Step 2
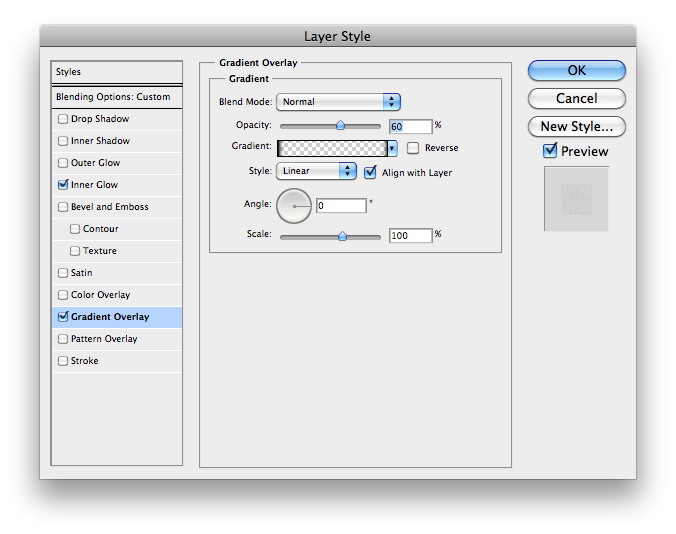
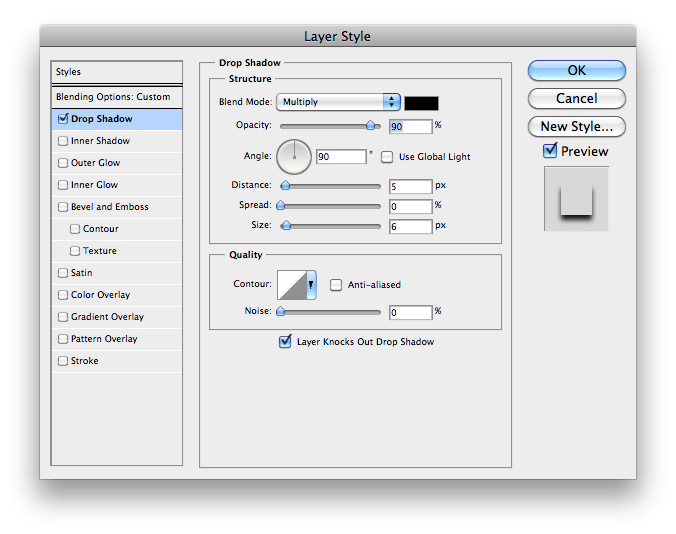
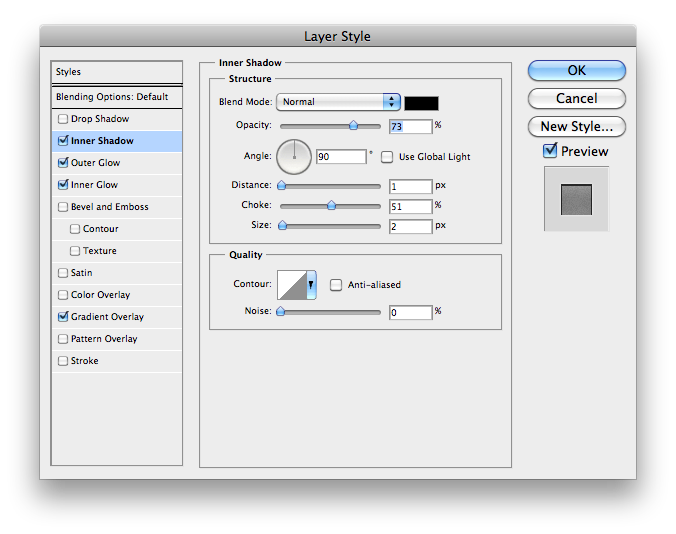
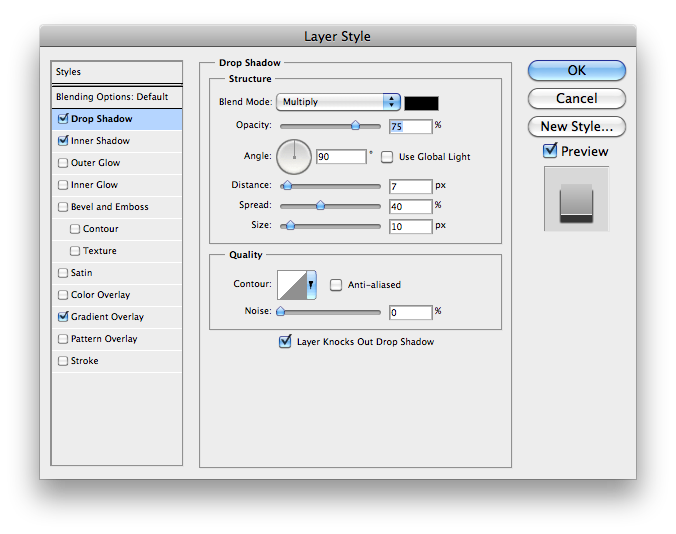
Duplicate the layer and add the following layer styles.

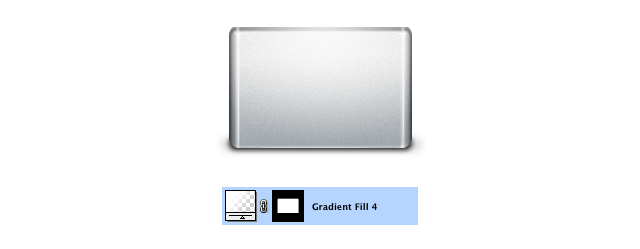
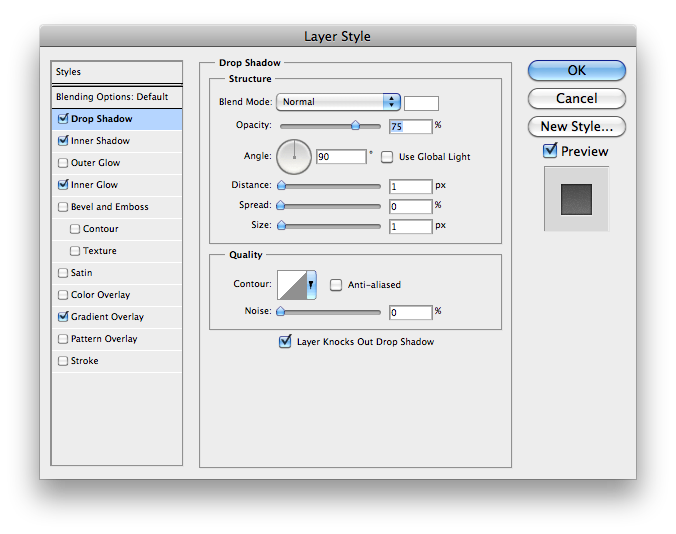
Step 3
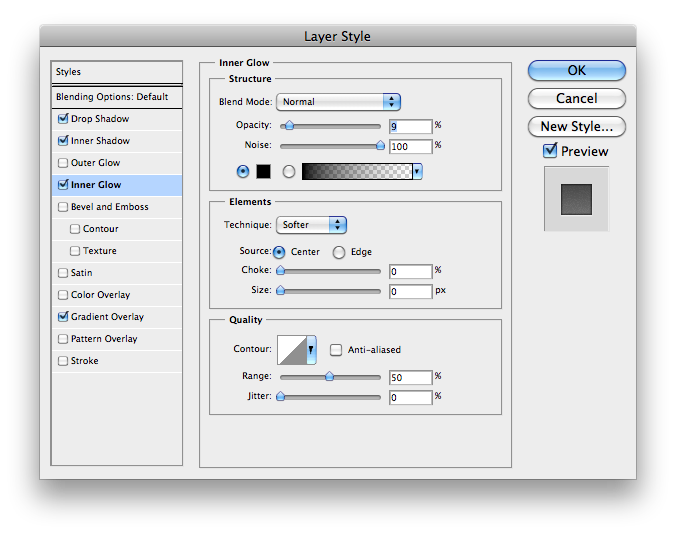
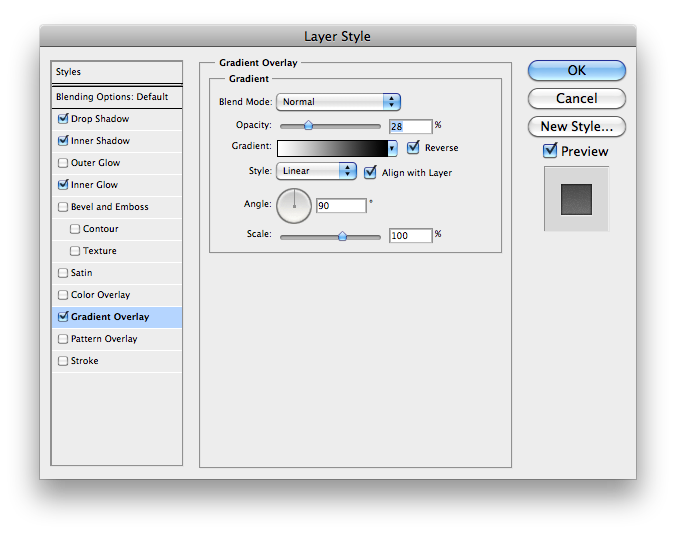
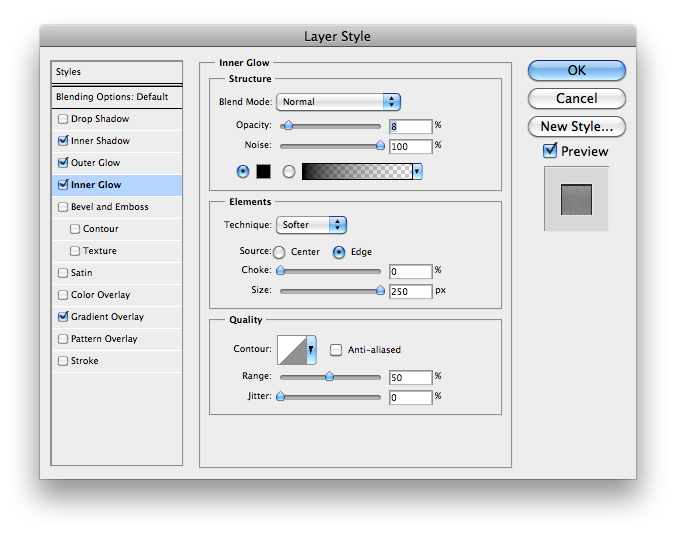
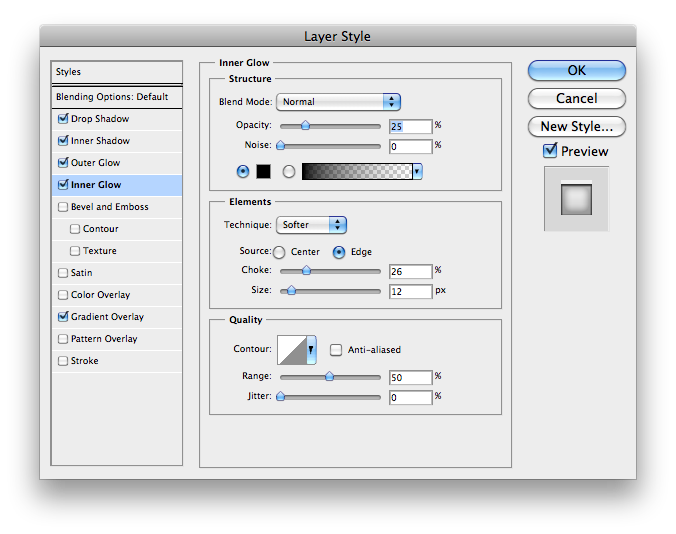
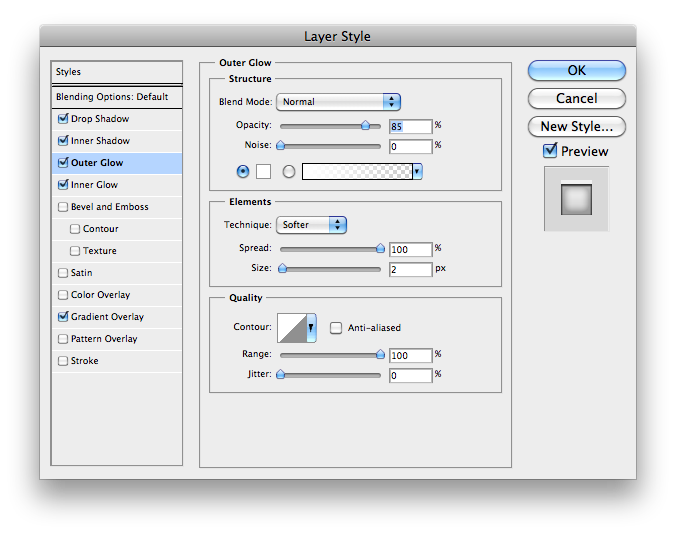
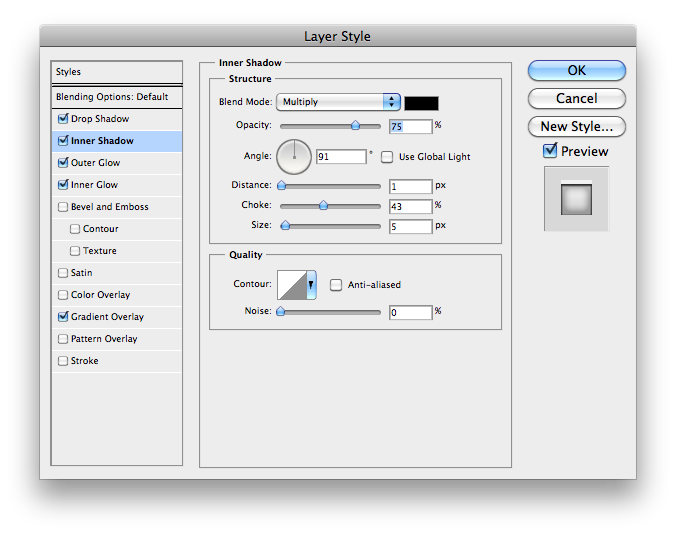
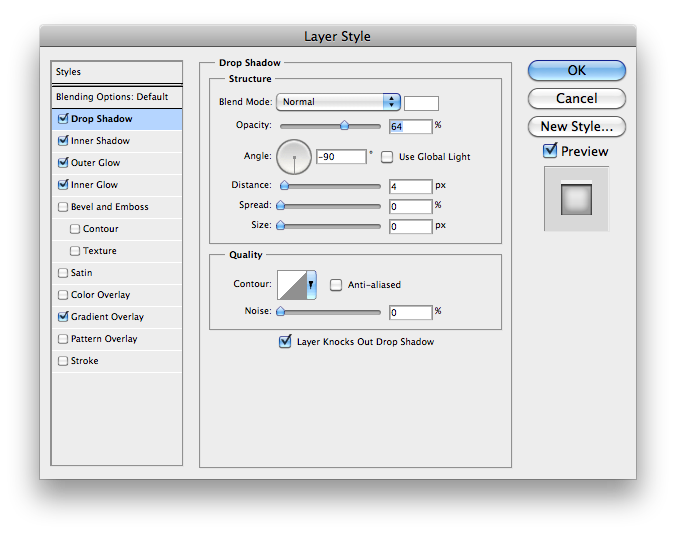
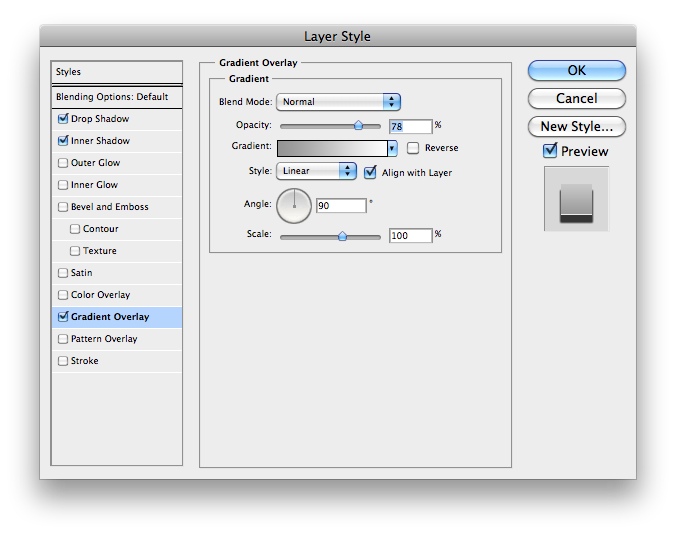
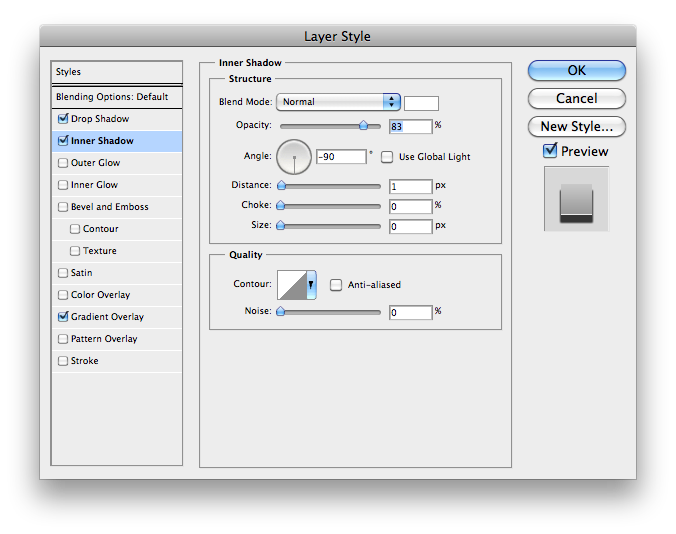
Make a rounded rectangle like the one below and add the following layer styles. Make sure to set the fill to 0%

Step 4
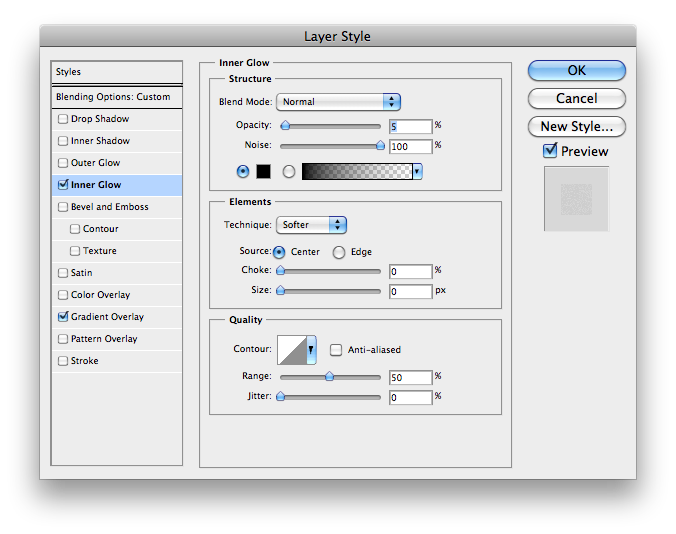
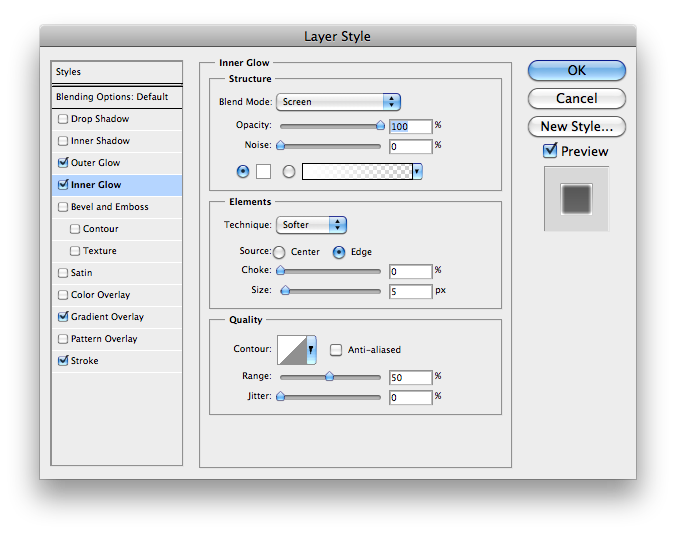
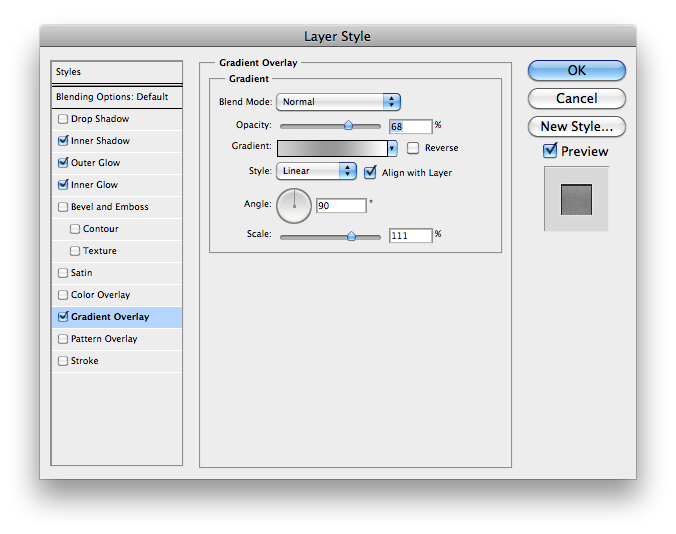
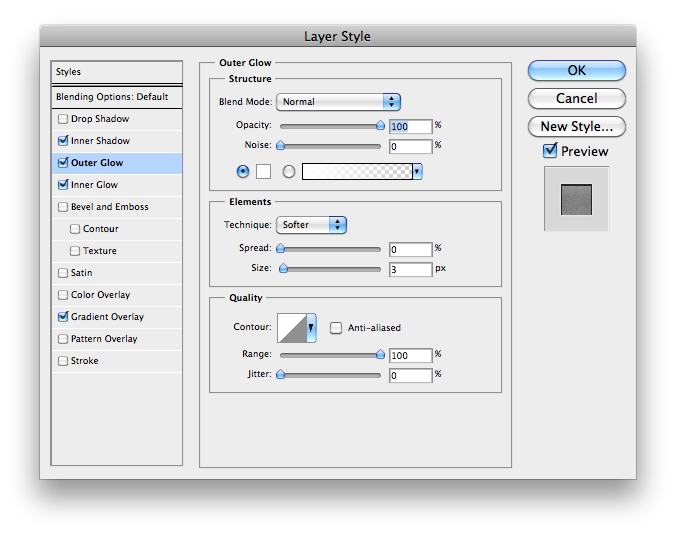
Make another rounded rectangle and apply the following layer styles. Make sure to set the fill to 0%

Step 5
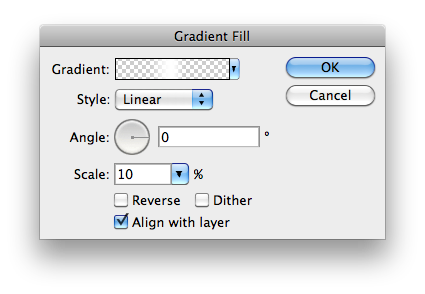
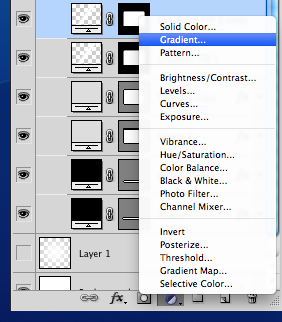
Go here, and create a new gradient fill and make sure it looks like this. Duplicate and drag it to the left.

Step 6
Make the same shape then duplicate and drag it to the right and then do the same thing on the bottom.

Step 7
Make a 1px line and give it a layer mask and with the black brush go over the sides
Step 8
Make another 1px line and place it above the gradient on the left. Duplicate and move to the right.
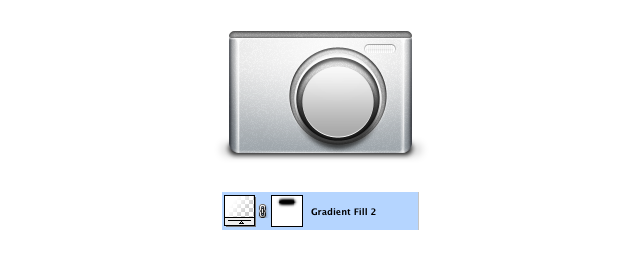
Step 9
Make a gradient fill and just keep the default settings. Add a layer mask and grab the selection of the body ( step 1 ) by getting the path selection tool and right clicking make selection then inverse and click on the gradient fill mask and go to select > inverse and fill with black.
Step 10
Make a round rectangle ( #d0d0d0 ) and then do free transform ( cmd + t or ctrl + t ) and do the same perspective. Apply the same layer styles.


Step 11
Now make a rounded rectangle like the below and use the following layer styles. Make 8 1px lines with a opacity of 50% . Now make another rounded rectangle that’s half of the original one and make the opacity 50%.


Step 12
Make a circle with the ellipse tool and use the following layer styles.

Step 13
Duplicate and then do free transform width: 85% height: 85% Then use the following layer styles and move it down 3 pixels down. Duplicate and use the following layer styles. Move it down 4px down.

Step 14
Now do a gradient fill with the following style. Place it right as you see in this image.


Step 15
Duplicate the layer from step 13 and free transform width: 90% height: 90%. Use the following layer styles and make the shape color #232323. Now duplicate the layer and free transform width: 90% height: 90%. Apply the following layer styles.
Step 16
Make a long rectangle and convert it to a smart layer then use Gaussian blur ( filter > blur > Gaussian blur )

Step 17
Now duplicate the circle shape from step 15 ( #001634 ) and use free transform and change the width & height to 85% and apply the following layer styles.

Step 18
Duplicate and make the opacity 80% with the blending mode overlay. Now cut out a triangle like the one below. Duplicate again and do another different triangle.

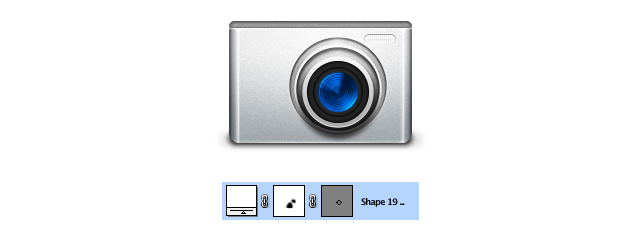
Step 19
Make a circle with the ellipse tool inside the lens and copy and paste it on the same shape layer then use free transform and make the width & height 85% and subtract from path. Now do the same thing 5 times but this time make the circle smaller.
Make the blend mode to overlay and the opacity to 55%.

Step 20
Make another circle with the ellipse tool like in step 19 and resize it down by 95% with the same blending mode and opacity as before.

Step 21
Create a new gradient fill layer. Click on the blue lens and get the get selection tool. Click on the shape and right click “make selection†then go to the gradient fill layer click on the mask thumbnail and go to select > inverse and fill it with black. Use the following gradient fill style and move it down on the edge of the lens. Duplicate and move it towards the top.
Step 22
Make a ellipse tool like in step 19 with the same blending mode and opacity. Now add a layer mask and with the 34px black brush go over the sides.

Step 23
Make a black ellipse tool and center it in the middle. Set the blending mode to overlay and opacity to 55%

Step 24
Create a new gradient fill and use the following gradient style. Now move toward the gradient to the bottom left of the black circle and set the blending mode to overlay. Duplicate and move it to the top right. Next make one small circle and move on top of the bottom left gradient. Do a bigger circle and move it to the top right.
Step 25
Make a black square on top of the camera and make a circle while holding down shift and use free transform to make the height smaller by dragging down the top. Apply the same layer styles. Now make a rectangle and move it to the middle with a opacity of 20% . Duplicate the rectangle and make it thinner.

Step 26
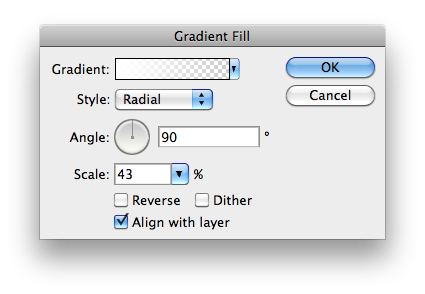
Make another circle and do the same thing like in step 25 and use free transform to make the height smaller. Apply the following layer styles. Make a new gradient fill with the style “radial†and scale 10.
